|
|
Stencils instead of decals |
 |
by Christian Jakl |
| |
| |
| |
 Who does not know about the "silvering" of decal film that lets an outstanding
paint job look old. This is especially true when the paint is not as glossy
and the decal does not cling very well. There are two ways to address this
problem:
Who does not know about the "silvering" of decal film that lets an outstanding
paint job look old. This is especially true when the paint is not as glossy
and the decal does not cling very well. There are two ways to address this
problem:
Either one cuts the carrier film from the moist decal which is troublesome
and fidgety work or one uses stencils and spray paints the marking in question.
One cannot dismiss decals totally since small designs and small lettering
can only be applied in decal form. To the larger markings that the eye is
immediately attracted to, a very good result can be achieved with stencils.
The advantage here is the opacity of the paint can be varied and it also
eliminates problems with recessed panel lines in large areas to be covered.
 National
emblems and markings: National
emblems and markings:
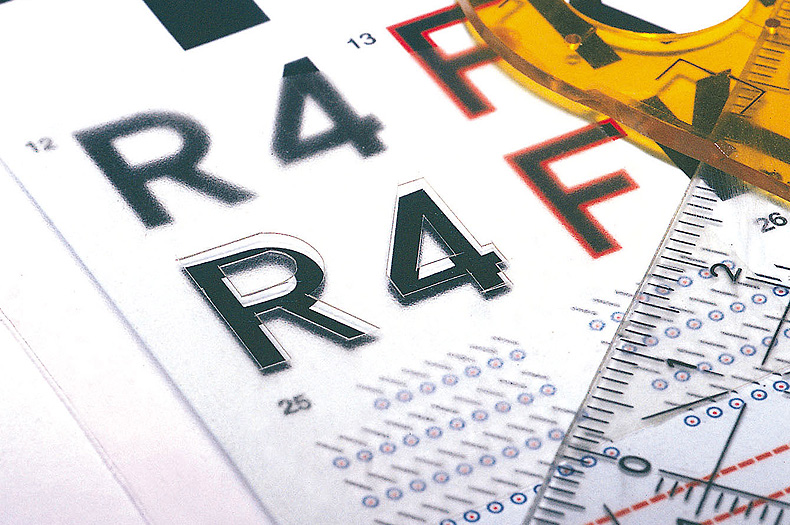
The basis for the stencils is the decal sheet contained in the kit. Lay
a relativly thick sheet plastic foil on top of the decal sheet and fix it
firm with tape. Then use frisket paper (in my case Revell Masking foil)
and stick it on top of the plastic foil beneath it. With a ruler and a sharp
knife cut out your mask based on the decal underneath. Use curved template
rulers available in office supply stores for curves and circles. Pull the
mask carefully from the backing and apply to model making sure of proper
alignment. If more than one color is needed it is only a matter of time
and number of masks. Even American markings should not be a problem. |
 |
| |
| |
|
|
|
|
|
| |
|
|
|
|
|
| |
|
|
| |
| |
|
|
| |
|
|
| Image 1: |
| The basis, the decal |
|
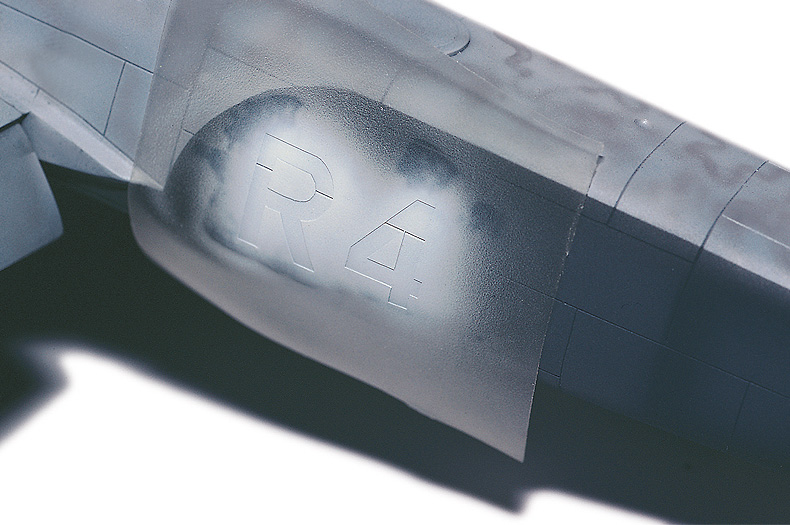
| Image 2: |
| Positioned and airbrushed. Short
drying period. |
|
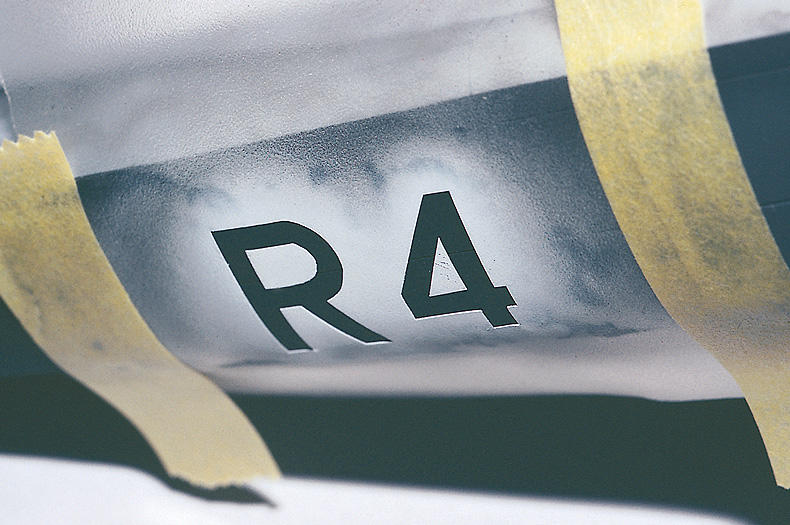
| Image 3: |
| Same mask on the other side of
the fuselage, a new one is not necessary |
|
|
|
| |
|
|
| |
| |
|
|
| |
|
|
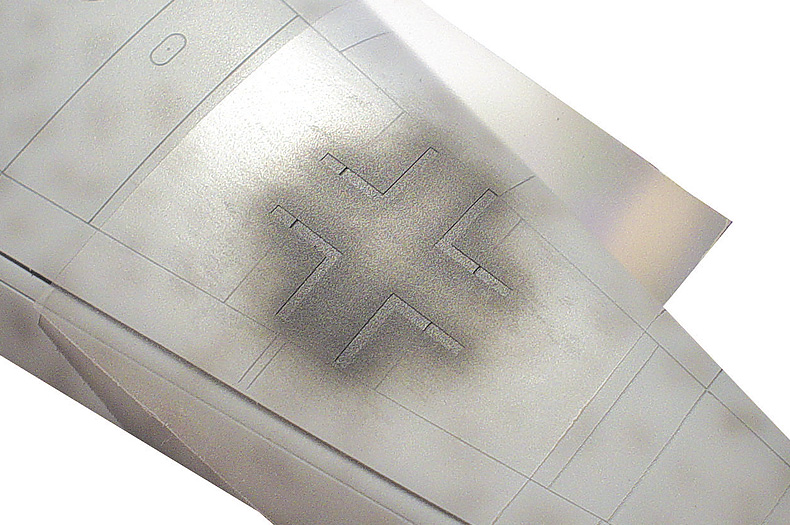
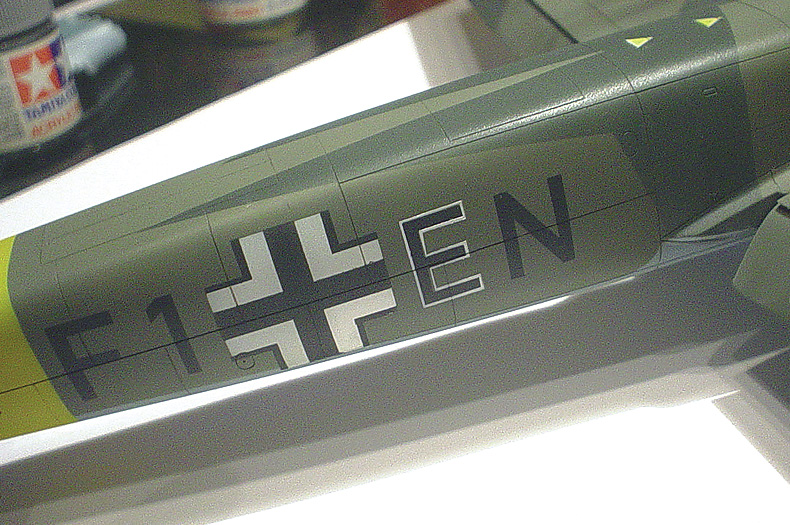
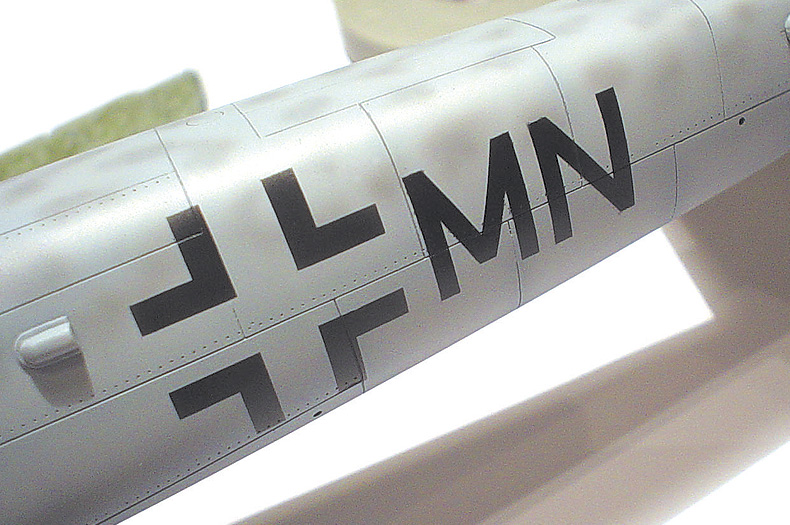
| Image 4: |
| National emblem? This is only
possible with Luftwaffe models but very simple. |
|
| Image 5: |
| Outline lettering or multi-colored
motifs... |
|
| Image 6: |
| ...a little more effort, but
an acceptable result . |
|
|
|
| |
|
|
|
|
|
|
|
| |
| |
A little tip: After a short drying period pull the mask
off. The Revell mask leaves after multiple uses remnants of adhesive on
the paint job. Take care here and make sure to use more than one thin dry
coat rather than a wet coat because this leaves a noticeable ridge when
the mask is removed.
It is possible with this method to create a model that is different from
the decal instructions and can be individualized. Other markings are possible
and expands the possibilities of what can do with the models on has on hand.
Other
possibilities:
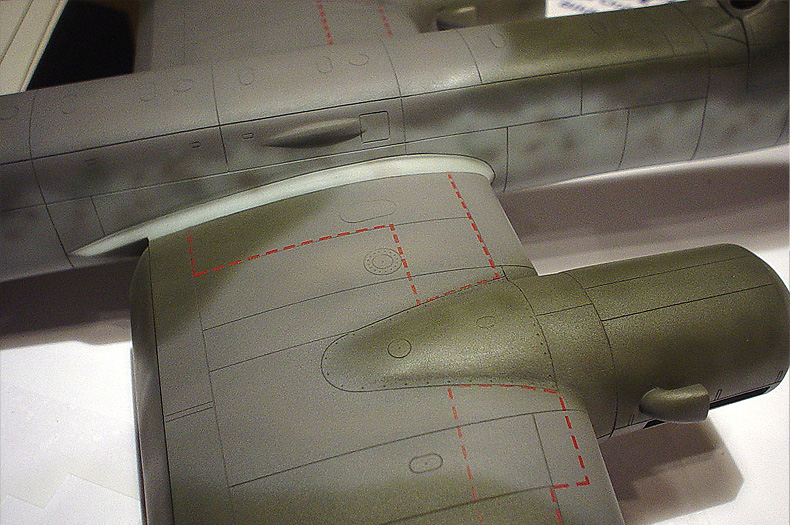
Arrows, lines, invasion stripes etc. No problem. Everything that is not
a drawing can be airbrushed... For me walkways always presented an optical
problem and that is why I came up with the following solution to the problem
of getting rid of the ugly carrier film. |
| |
| |
|
|
|
|
|
| |
|
|
|
|
|
| |
|
|
| |
| |
|
|
| |
|
|
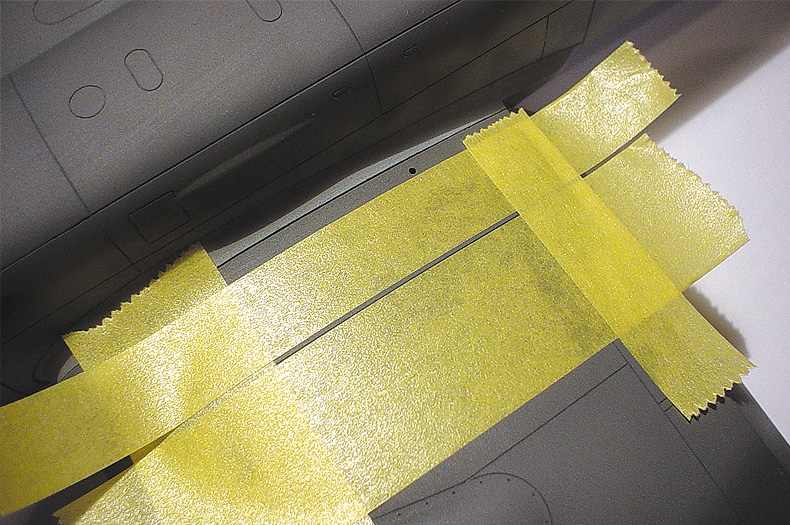
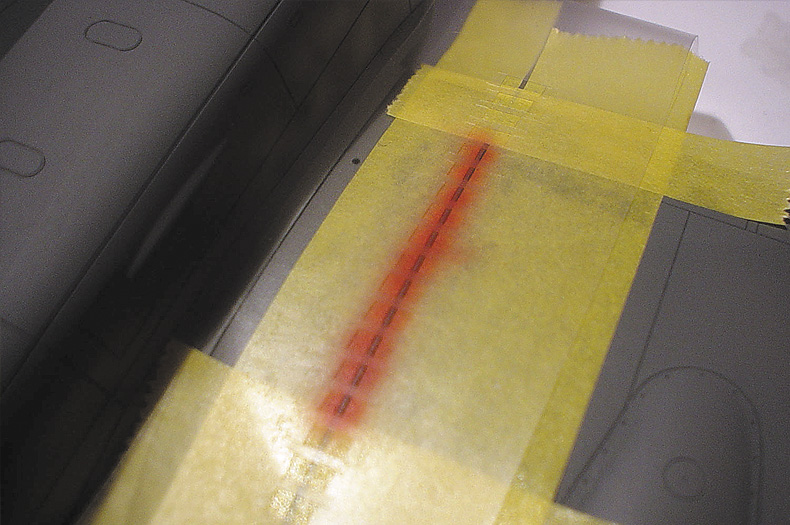
| Image 7: |
| Using Tamiya masking tape mask
of the edges of the walkways. |
|
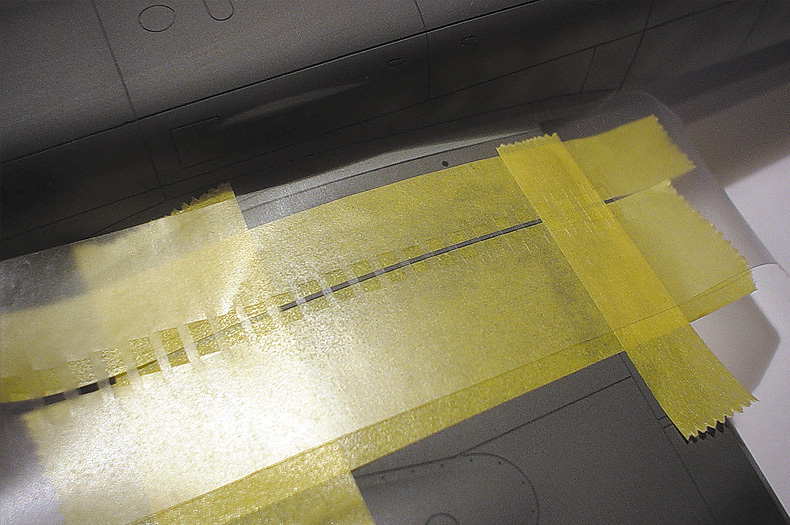
| Image 8: |
| On a properly fitted piece of
frisket paper cut small windows at regular distances.
This is then firmly glued on the masked edges of
the walkway. Make sure you firmly press down on
the frisket paper. |
|
| Image 9: |
| Airbrush! You decide on the opacity
of the paint. If you are careful and apply the right
amount of paint (not too wet) you can pull the mask
of right away and proceed briskly with your work. |
|
|
|
| |
|
|
|
|
|
|
Conclusion:
A good result can only be achieved with additional efforts. For sure it
is easier and faster to apply decals with softener and water, but the decal
carrier will remain. It may not be visible at first glance, but it will
appear if you look at the decal from different angles. With my type of painting
this effect will be eliminated. But it needs lots of masking tape, foil
and a Rucksack of patience. |
| |
| |
|
|
|
|
|
|
|
| |
meet the author |
|
|
|
| |
Christian Jakl |
|
|
|
| |
|
|
|
|
| |
I was born in Vienna in 1971 and now I live in the middle of the mountains in the Tyrol district. I am in marketing and my specialty is graphic design and layout. Ships, planes and automobiles is how it started and now I have taken up aircraft models only. I concentrate on the German and Soviet air force. My favorite mode of display are dioramas in 1/48 scale. Here I can let my imagination run wild and can produce many of parts. Experimentation and the use of new techniques are foremost on my mind. I also combine stock kits with other add ons and try out new tools. There is always a lot to learn.
It is not all that important to me if a detail is no exactly in the right spot; the final product has to look right. If somebody stands in front of my model and is enthused then I did my job right. The only problem I have is the time factor and in this I probably not alone. I wish everybody a lot of fun with this page and hope that critiques and comments are forthcoming. |
|
 |
|
| |
|
|
|
|
| |
Email:  jakl.christian@gmx.at jakl.christian@gmx.at |
|
|
|
| |
|
|
|
|
|
|
|
|
 |
 |
This page: THEMES: Stencils instead of decals
was last modified on: Jul 14, 2004
The URL of the page is: http://www.rlm.at/cont/thema03_e.htm
© Copyright www.rlm.at
and the contributing author(s). All Rights Reserved. Used with permission.
Terms of use: All material within this site is protected under copyright
and may only be reproduced for personal use. You must contact the Author(s)
and/or Editor for permission to use any material on this site for any purpose
other than private use! |
| |
|